PLEASE READ AND FOLLOW THIS DOCUMENT COMPLETELY
The following covers how to add images for products.
This includes images for sale, and images to show on the storefront.
STEP 1: Prepare your images to be uploaded to the website
Before any images can be uploaded, they need to be formatted and zipped up.
Here are the steps to take to prepare your images:
PROMOTIONAL IMAGES FOR THE WEBSITE (Public Store Images)
- Select 1 or more images you’d like to use to promote or preview your image or image group.
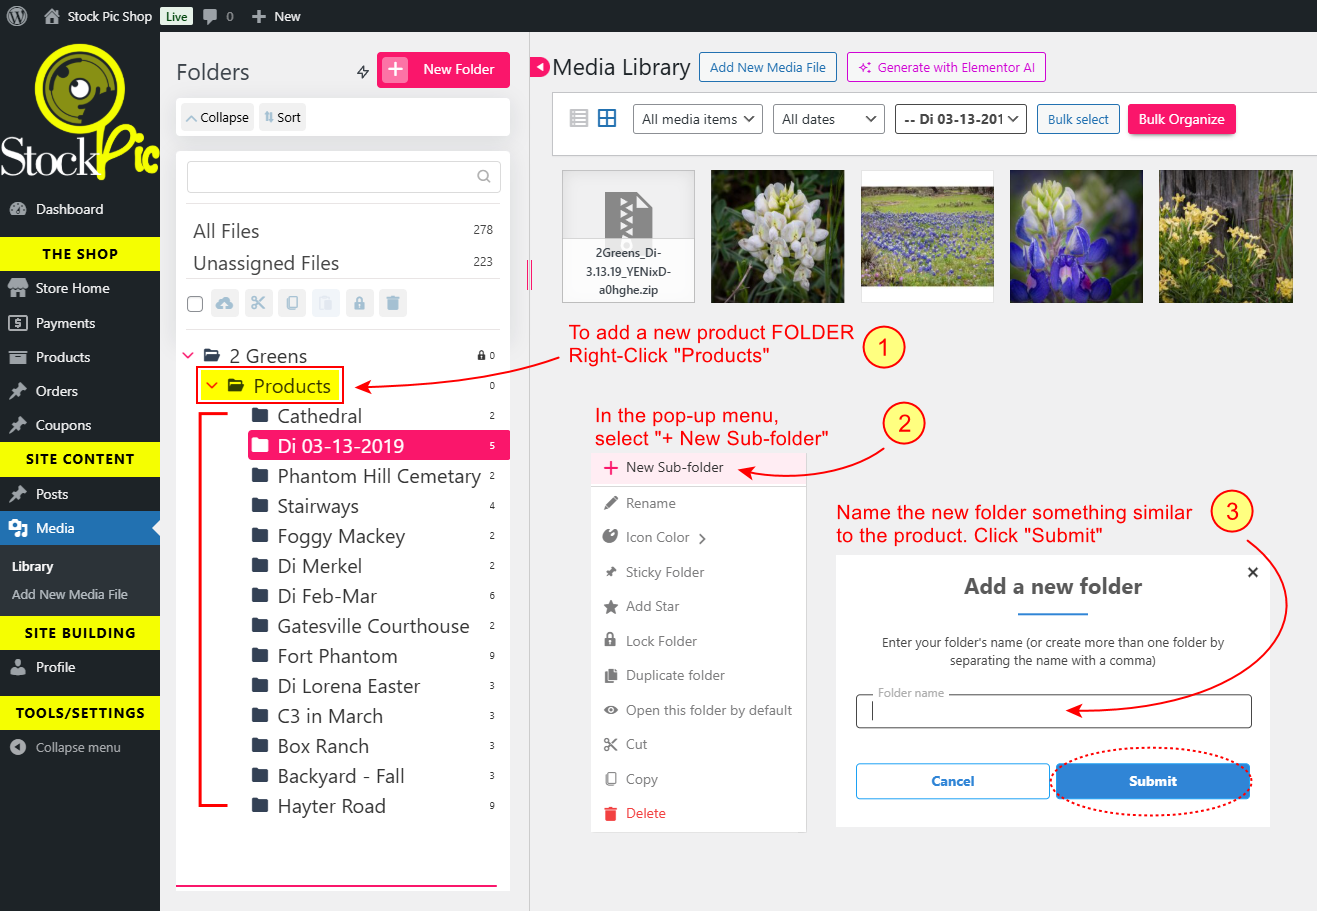
- FEATURED IMAGE:
The “featured image” is the first image visitors will see of your product.- The “Featured Image” should not have watermarks on it, but this is not a rule, and is ultimately up to you.
- The “Featured Image” can be a bit larger than other sample images (1920×1080 typically, and less than 1 megabyte is file size)
- Save the featured image in compressed JPEG or WebP format and try to maintain a good, crisp version (don’t compress it too much)
- ADDITIONAL IMAGES:
You can add more images to show off the product, especially if the product is a group of images.- All the images for promotion should be smaller (preferably no larger than 800×800 pixels), and saved as a compressed JPEG or WebP format.
- Images should be relatively small in file size (no larger than 999 megabytes, but preferably much smaller, like less than 250 kilobytes)
- Additional images can have watermarks on them. This helps protect from piracy, which is why the images should also be small and used as preview only.
- Furthermore on watermarks: small preview images can easily be up-scaled these days with free-to-use AI tools, so having watermarks on them helps.
- FEATURED IMAGE:
- While adding a product, add your images. (See guide on adding a product ↗)
- Select 1 or more images you’d like to use to promote or preview your image or image group.
PREPARE IMAGES FOR SALE (The Final Product)
- For a single product, gather the FULL-SIZED, NON-WATERMARKED image, or images (if in a group) into a folder.
- For organizational purposes, it’s a good idea to name the folder with the SKU you will give the product when added to the store.
- Zip up the folder, or select all of the images for the product, and ZIP them into an archive.
- PCs and MACs have a built-in ZIP tool, but you can also download a 3rd party app like 7-ZIP.
- For multiple images, you can make several ZIP files for one product if you’d like.
- After the files are ZIPped up, make sure the name of the ZIP file(s) describes the product.
- Here’s an example: 2greens_normalized_JQDCwU-cokqwq_01.zip

- If you want to create a random product ID, use an online tool like the Online GUID Generator.
- Here’s an example: 2greens_normalized_JQDCwU-cokqwq_01.zip
- For a single product, gather the FULL-SIZED, NON-WATERMARKED image, or images (if in a group) into a folder.
STEP 2: Create a folder in Media for your Images
Each product should have its own folder to store images for promotion, and the ZIP file(s) the customer will receive after purchase.
See the screenshot for visual instructions and/or follow these steps below:
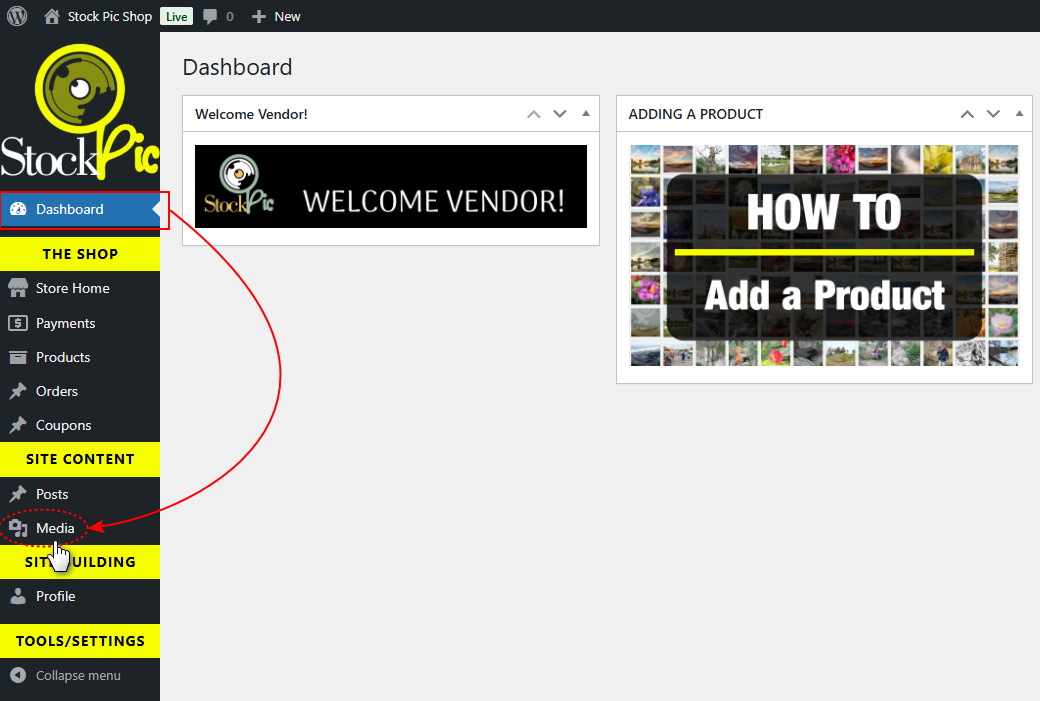
- Login to your vendor admin area.
- From the LEFT MENU AREA, click on “Media”
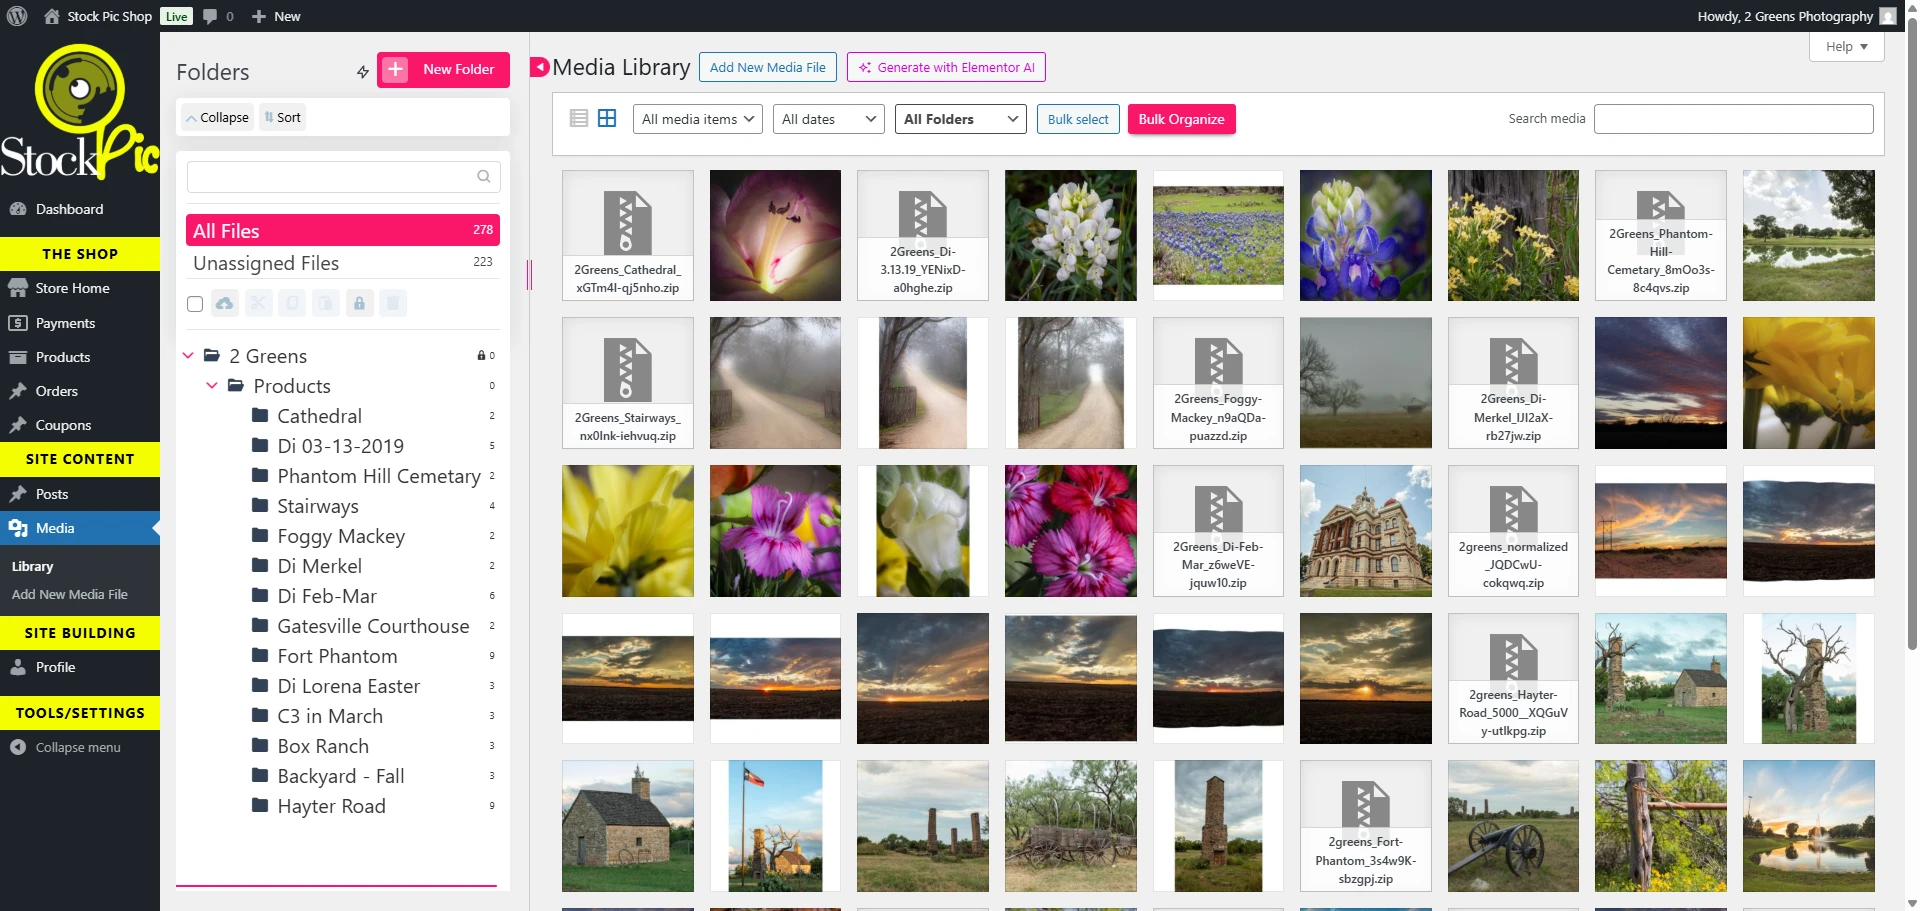
This will show all your media and product images. - Locate the “Products” folder from the file tree on the left.
- RIGHT-CLICK the “Products” folder and from the pop-down menu, select “+ New Sub-Folder”.
- In the new folder dialog, give your product folder a name.
* Make sure the name represents the product or images, or image group you’re selling.
* This will only be seen by you, not the customer or visitors to the website. - Click, “SUBMIT” to add the folder.
UPLOAD YOUR FILES*:
- While your new product folder is selected, drag all of the images and ZIP files into the web page.
- This will automatically start uploading your files.
- Optionally, you can click the “Add New Media File” button and select your files from your computer.
- While your new product folder is selected, drag all of the images and ZIP files into the web page.
*Max File Sizes and Dimensions:
- Public images (images used in the store to show off your products)
- Featured Image: 1920×1080 pixels, Less than 1 megabyte
- Gallery Images: 800×800 pixels, Less than 1 megabyte each
- Product Images (images for sale)
- Product ZIP Files:
- Maximum file size: 256 megabytes
- There is no maximum image dimension limit
- Product ZIP Files:
- Public images (images used in the store to show off your products)
